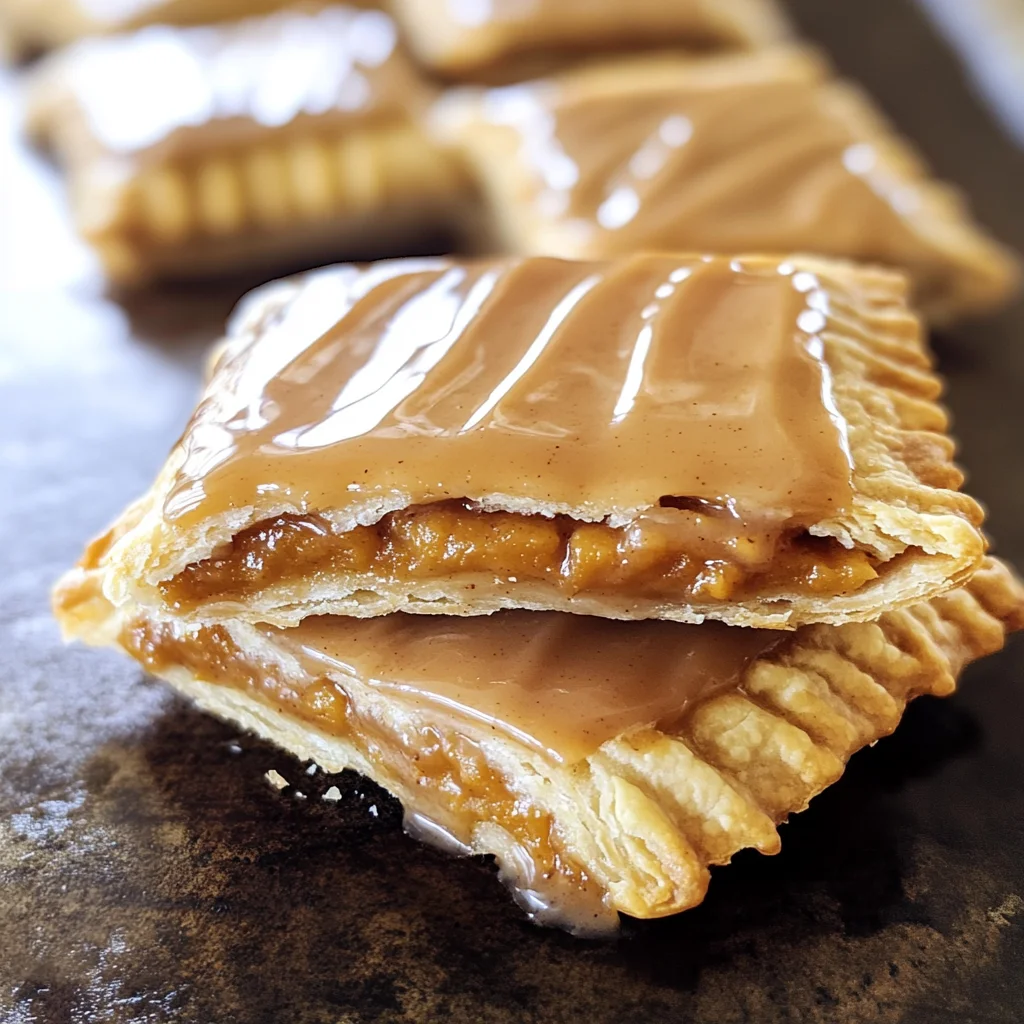
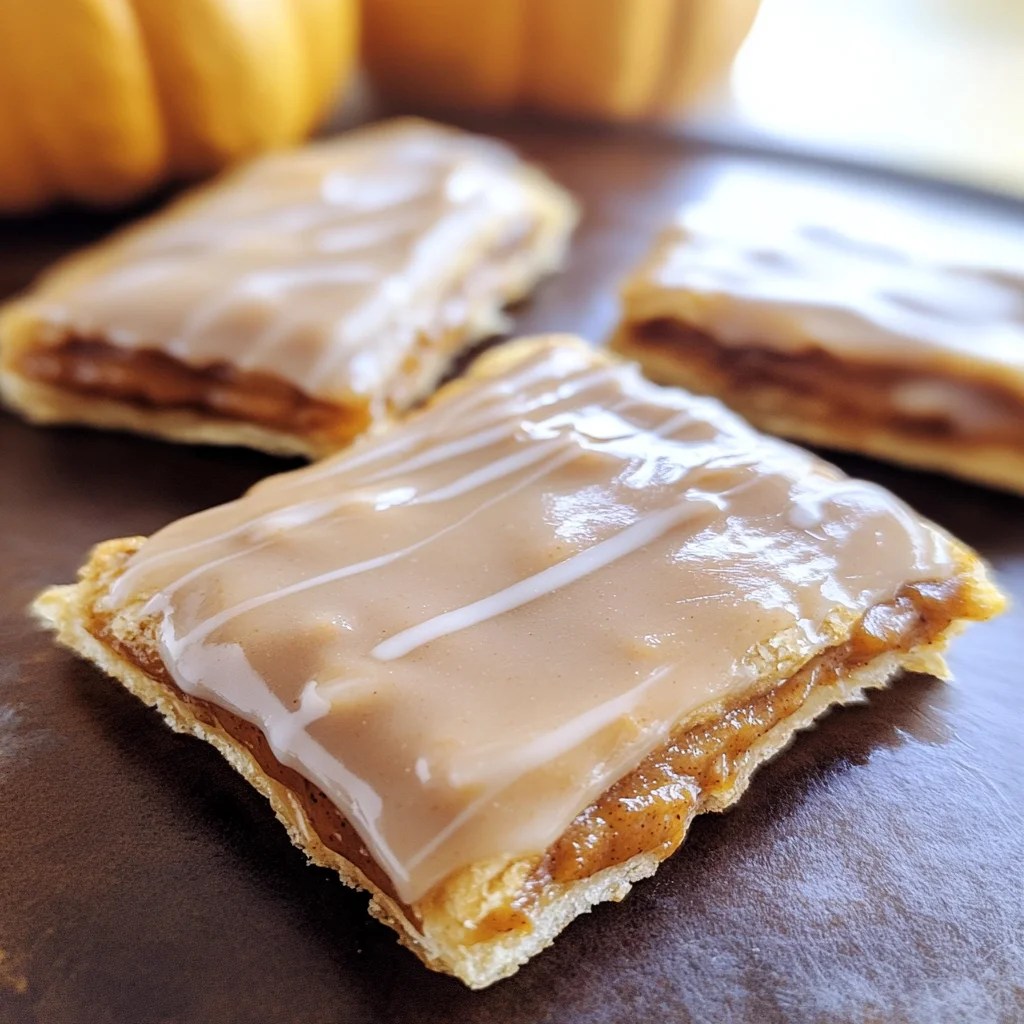
Maple-Glazed Pumpkin Poptarts
These Maple-Glazed Pumpkin Poptarts are a delightful treat that captures the essence of fall in every bite. Perfect for dessert or a sweet breakfast, these poptarts feature a flaky crust filled with a rich maple pumpkin filling and topped with a luscious glaze. Whether you’re hosting a gathering, enjoying family time, or simply indulging yourself, these poptarts are sure to impress.
Why You’ll Love This Recipe
- Easy to Make: With simple ingredients and straightforward steps, even novice bakers can whip these up quickly.
- Deliciously Unique Flavor: The combination of maple and pumpkin creates a mouthwatering experience that stands out from traditional pastries.
- Versatile for Any Occasion: Serve them at brunch, as an after-school snack, or at holiday gatherings; they fit right in!
- Customizable Filling: Feel free to adjust the spices or sweetness to suit your taste preferences.
- Make Ahead Option: Prepare the filling in advance and assemble when ready for fresh poptarts anytime!
Tools and Preparation
Before diving into this scrumptious recipe, gather your essential tools and equipment. Having everything ready will make the process smoother and more enjoyable.
Essential Tools and Equipment
- Rolling pin
- Baking sheet
- Medium mixing bowl
- Fork
- Small mixing bowl
Importance of Each Tool
- Rolling pin: Ensures an even thickness for the pie crust, leading to perfectly baked poptarts.
- Baking sheet: Provides a sturdy base for baking; makes transferring easy.
- Medium mixing bowl: Ideal for combining ingredients without worrying about spills.
- Fork: Perfect for crimping edges, sealing the filling inside while adding decorative flair.
Ingredients
To create these delicious Maple-Glazed Pumpkin Poptarts, you’ll need the following ingredients:
For the Poptarts
- 1 refrigerated pie crust roll (found near the refrigerated biscuits)
- 1/2 cup canned pumpkin
- 1/3 cup brown sugar (packed)
- 1/2 tsp. maple flavoring
- 1/4 tsp. pumpkin pie spice
- dash of salt
For the Glaze
- 1/2 cup powdered sugar
- 1/4 tsp. maple flavoring
- 1 Tbsp. milk
How to Make Maple-Glazed Pumpkin Poptarts
Step 1: Preheat the Oven
Preheat your oven to 375ºF (190ºC) to ensure it’s hot enough for baking.
Step 2: Prepare the Pumpkin Filling
In a medium bowl:
1. Combine canned pumpkin, brown sugar, maple flavoring, pumpkin pie spice, and a dash of salt.
2. Mix until fully combined and set aside.
Step 3: Roll Out the Pie Crust
On a floured surface:
1. Turn out your refrigerated pie crust roll.
2. Using a rolling pin, roll it into a thin rectangle measuring approximately 6×22 inches.
3. Cut into 8 even rectangles.
Step 4: Assemble the Poptarts
For each poptart:
1. Place one rectangle on a baking sheet.
2. Spoon a large dollop of pumpkin mixture into its center, leaving space around the edges.
3. Top with another rectangle and press down on the edges.
Step 5: Crimp Edges
Using a fork:
1. Crimp the edges by placing the fork’s tip about 1/2 inch over the edge of each poptart.
Step 6: Bake
Place in preheated oven:
1. Bake for 9-11 minutes or until edges are lightly browned.
Step 7: Prepare the Glaze
In a small bowl:
1. Mix together all glaze ingredients—powdered sugar, maple flavoring, and milk.
Step 8: Glaze Poptarts
Once cooled:
1. Spoon glaze generously over each poptart.
2. Allow glaze to harden before serving.
Enjoy your homemade Maple-Glazed Pumpkin Poptarts! They are sure to be a hit!
How to Serve Maple-Glazed Pumpkin Poptarts
These delightful Maple-Glazed Pumpkin Poptarts can be enjoyed in various ways. Whether for breakfast, dessert, or a snack, they make a versatile treat that everyone will love.
With Whipped Cream
- Top each poptart with a dollop of whipped cream for a light and fluffy addition that complements the maple flavor.
Accompanied by Fresh Fruit
- Serve with sliced apples or pears to add a refreshing contrast to the sweet poptarts.
With Hot Beverages
- Pair your poptarts with a warm cup of coffee or tea. The warmth enhances the flavors and makes for a cozy experience.
On a Dessert Platter
- Arrange the poptarts on a platter alongside other desserts like cookies and brownies for an enticing dessert spread.
How to Perfect Maple-Glazed Pumpkin Poptarts
To ensure your Maple-Glazed Pumpkin Poptarts turn out perfectly every time, consider the following tips:
-
Use Chilled Ingredients: Make sure your pie crust is cold. This helps achieve a flaky texture when baked.
-
Avoid Overfilling: Don’t add too much pumpkin filling. A tablespoon is usually sufficient; otherwise, it can ooze out while baking.
-
Crimp Well: Press the edges firmly when crimping to seal in the filling and prevent leaks during baking.
-
Monitor Baking Time: Keep an eye on the poptarts as they bake. Remove them when the edges are lightly browned for the best texture.
Best Side Dishes for Maple-Glazed Pumpkin Poptarts
Pairing side dishes with your Maple-Glazed Pumpkin Poptarts can enhance your meal and provide variety. Here are some great options:
-
Yogurt Parfait
Layer yogurt with granola and berries for a deliciously creamy contrast. -
Chia Seed Pudding
A nutritious option that offers a fun texture; serve it flavored with vanilla or cinnamon. -
Maple Syrup Drizzle
A simple drizzle of pure maple syrup adds extra sweetness and enhances the maple flavor. -
Nut Butter
Serve with almond or peanut butter for added protein and richness that complements the sweetness of the poptarts. -
Granola Bar Bites
These chewy snacks offer crunch and are perfect for those who enjoy something healthy alongside their sweets. -
Smoothie Bowl
A refreshing smoothie bowl topped with nuts and seeds provides balance to your dessert experience.
Common Mistakes to Avoid
When making Maple-Glazed Pumpkin Poptarts, it’s easy to make a few common mistakes. Avoid these pitfalls for the best results.
- Using too much filling: Overfilling your poptarts can cause them to burst during baking. Ensure you leave enough space at the edges for sealing.
- Not rolling the crust thin enough: A thick crust can lead to a doughy texture. Roll your pie crust out to a very thin rectangle for a crispy finish.
- Ignoring the crimping: If you don’t crimp the edges well, the filling may leak out. Use a fork to create a tight seal around the edges.
- Skipping the glaze: The glaze adds sweetness and enhances flavor. Don’t skip this step; mix it well and apply once your poptarts have cooled.
- Baking at incorrect temperature: Baking at too low or too high of a temperature can affect cooking time and texture. Stick to 375ºF for optimal results.
Storage & Reheating Instructions
Refrigerator Storage
- Store in an airtight container for up to 3 days.
- Place parchment paper between layers to prevent sticking.
Freezing Maple-Glazed Pumpkin Poptarts
- Freeze unglazed poptarts for up to 2 months.
- Wrap each in plastic wrap and store in a freezer-safe container.
Reheating Maple-Glazed Pumpkin Poptarts
- Oven: Preheat to 350ºF, place poptarts on a baking sheet, and heat for about 10 minutes until warm.
- Microwave: Heat one at a time for about 15-20 seconds for quick reheating.
- Stovetop: Place in a skillet over low heat, cover, and warm for about 5 minutes.
Frequently Asked Questions
Here are some common questions regarding Maple-Glazed Pumpkin Poptarts.
Can I use fresh pumpkin instead of canned?
Yes, you can use fresh pumpkin puree. Just ensure it is well-cooked and drained of excess moisture.
How do I make these gluten-free?
You can substitute regular pie crust with gluten-free pie crust. Make sure all other ingredients are gluten-free as well.
What if I don’t have maple flavoring?
You can use vanilla extract as an alternative, but it will change the flavor profile slightly.
Can I customize the filling?
Absolutely! Feel free to add spices like nutmeg or even chocolate chips for variation.
Final Thoughts
These Maple-Glazed Pumpkin Poptarts are not only delicious but also versatile. You can easily customize them with different fillings or spices according to your taste. Give this recipe a try, and enjoy the delightful flavors in every bite!
Maple-Glazed Pumpkin Poptarts
Indulge in the flavors of fall with these Maple-Glazed Pumpkin Poptarts, a delightful treat perfect for any time of day. These poptarts feature a flaky crust enveloping a rich, spiced pumpkin filling that captures the essence of autumn. Topped with a sweet maple glaze, they combine comfort and indulgence in every bite.
- Prep Time: 20 minutes
- Cook Time: 11 minutes
- Total Time: 31 minutes
- Yield: Makes 8 servings 1x
- Category: Dessert
- Method: Baking
- Cuisine: American
Ingredients
- 1 refrigerated pie crust roll
- 1/2 cup canned pumpkin
- 1/3 cup brown sugar (packed)
- 1/2 tsp. maple flavoring
- 1/4 tsp. pumpkin pie spice
- dash of salt
- 1/2 cup powdered sugar
- 1/4 tsp. maple flavoring
- 1 Tbsp. milk
Instructions
- 1. Preheat your oven to 375ºF (190ºC).
- 2. In a medium bowl, combine canned pumpkin, brown sugar, maple flavoring, pumpkin pie spice, and salt until well mixed.
- 3. Roll out the refrigerated pie crust on a floured surface into a thin rectangle (approximately 6×22 inches) and cut into 8 equal rectangles.
- 4. Spoon the pumpkin mixture onto half of the rectangles, leaving space around the edges. Top with remaining rectangles and press down to seal.
- 5. Crimp the edges with a fork to secure the filling.
- 6. Bake for 9-11 minutes until edges are lightly browned.
- 7. In a small bowl, whisk together powdered sugar, maple flavoring, and milk for the glaze.
- 8. Once cooled, generously spoon glaze over each poptart.
Nutrition
- Serving Size: 1 poptart
- Calories: 210
- Sugar: 12g
- Sodium: 115mg
- Fat: 8g
- Saturated Fat: 2g
- Unsaturated Fat: 6g
- Trans Fat: 0g
- Carbohydrates: 34g
- Fiber: 1g
- Protein: 2g
- Cholesterol: 0mg